



A flat roof can look uncomplicated from ground level. The roof surface sits behind the edge, the fascia or parapet forms a neat line, and the gutter below appears to take care of the rainwater. In practice, the roof perimeter is one of the most detailed parts of the build. It is where the roof covering, edge trim, gutter line, fascia, wall finishes, corners and drainage route all meet.
Flat roof drip edge trim helps create a more controlled finish at that exposed perimeter. It forms the outer edge detail where water leaves the roof surface and moves towards the gutter. It can also protect the visible edge of the roof build-up and create a cleaner transition between the roof covering and the fascia or wall beneath it.
That does not make drip trim a substitute for the wider roof design. Roof falls, membranes, outlets, flashings and adjoining wall details all need to work together. A trim can support a well-planned roof edge, but it cannot correct a poor roof fall, blocked drainage route or unresolved flashing detail.
For homeowners, builders, roofing contractors, architects, developers and facilities managers, the most useful question is not simply which trim to choose. It is what the full roof perimeter needs to do. This guide explains how flat roof drip edge trim fits into that wider decision, covering roof-edge planning, corners, joiners, gutters, flashing, finishes and the information worth preparing before an order is placed.
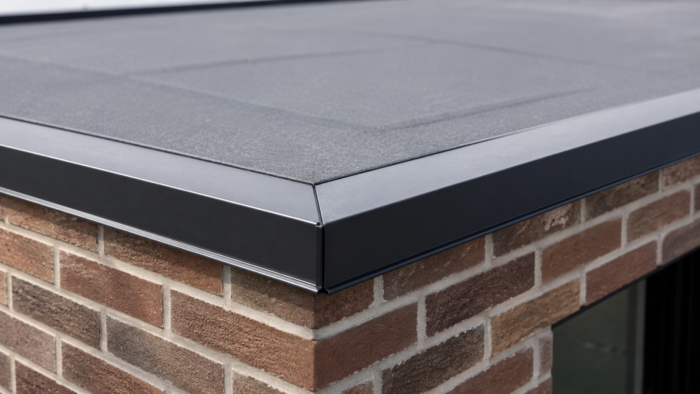
What Flat Roof Drip Edge Trim Does at the Roof Perimeter
Flat roof drip edge trim sits around the exposed outer perimeter of a flat or low-slope roof. Its visible role is straightforward. It creates a crisp, completed edge where the roof surface meets the outside of the building. Its practical role is connected to water movement, helping direct rainwater away from vulnerable roof-edge areas and towards the gutter line.
This becomes particularly important on a rear extension, garage, garden room or commercial flat roof where the roof edge is clearly visible from the ground. The trim may look like a slim aluminium line, but it sits in an area exposed to rain, wind, frost and repeated wetting. That means it needs to relate properly to the roof covering, the fascia, the gutter and the wall finish below.
The roof accessories range from Metal Profiles Ltd includes aluminium roof-edge drip trim, roof flashing, termination bars, soakers, pipe sleeves and other roof-detail products. Looking at the wider range can be useful because a roof edge is usually made up of several connected components rather than one isolated profile.
Drip Edge, Fascia and Gutter: Three Different Roles
A drip edge trim, fascia and gutter are often seen together, but they do not perform the same function. Drip trim forms the roof perimeter detail where water leaves the roof surface. Fascia creates the visible line below the roof edge and provides the area where guttering may be fixed. The gutter receives water from the roof edge and carries it towards outlets and downpipes.
Their relationship should be considered from the beginning. A well-finished roofline needs the trim, fascia and gutter to sit in a visually coherent arrangement. The trim should suit the roof build-up. The fascia should work with the required face depth. The gutter should sit where it can receive water from the roof edge as intended.
Treating these components as unrelated items can leave a roofline looking pieced together. On a modern extension, a neat alignment can make the roof edge feel deliberate and well resolved. On a garage or garden building, the same coordination still matters, even where the roofline is more modest in scale.
Why the Roof Perimeter Needs Early Attention
Roof-edge details are sometimes left until the project is already well advanced. By that stage, the roof covering, fascia position, gutter brackets, insulation build-up and wall finish may already have limited the available options. Considering drip trim earlier makes it easier to assess the correct face depth, projection, corner requirements and relationship with the gutter.
This is especially useful where a flat roof has several changes in direction, a stepped elevation, a side return, rooflights or connections to another roof section. A simple perimeter plan can identify straight runs, corners, returns and nearby junctions before individual components are selected.
The goal is not to overcomplicate a straightforward roof. It is to ensure the visible perimeter is planned as one connected arrangement rather than being assembled from separate decisions made at different stages.
Start with the Roof Build-Up, Not the Trim Profile
A drip edge trim needs to suit the roof detail behind it. Before considering colour or visual style, review the roof covering, construction build-up, fascia position, gutter line and the way rainwater is intended to travel over the roof surface. These decisions create the context in which the trim must work.
Flat roofs can vary considerably. One project may have a simple rectangular roof perimeter above a garage. Another may include rooflights, parapets, changes in level, side returns, wall abutments or connections to a pitched roof. These differences can affect where drip trim is relevant, where flashing is required and where another roof accessory may be more suitable.
The aluminium roof edge drip trim in a 3m length from Metal Profiles Ltd is intended for finishing roof edges in flat or pitched roofing systems to support water runoff. The final selection should still be reviewed against the actual roof construction, fascia detail, roof covering and project drawings.
Roof Falls, Outlets and the Direction of Water
Water needs a clear planned route across a flat roof before it reaches the outer edge. Roof falls, drainage outlets and gutter positions all form part of that route. The drip edge then supports the final movement of water away from the perimeter and towards the rainwater system.
This is why trim should not be treated as an isolated solution to a drainage problem. A drip edge may help create a defined perimeter and guide water from the roof edge, but it cannot correct unsuitable roof falls, blocked outlets, defective membranes or wider drainage issues. Those are separate matters that need attention within the roof design.
It is useful to think about rainwater in sequence. It lands on the roof surface, follows the intended fall, reaches the roof edge, enters the gutter and then continues through outlets and downpipes. The full route should be considered before the visible edge detail is finalised.
The Fascia and Gutter Relationship
The visible face of a drip edge trim is often close to fascia and guttering. Its proportion should therefore be considered against the depth of the fascia and the position of the gutter. A deeper trim face can create a stronger architectural line. A shallower face may suit a more restrained extension, garage or garden room.
Neither option is automatically right. The scale of the building, the thickness of the roof build-up and the amount of roof edge visible from ground level all influence what looks balanced.
The gutter below also needs to form part of the same visual and practical arrangement. A clean relationship between trim, fascia and gutter can make the roofline feel considered. A poorly coordinated relationship can make even a high-quality roof finish appear unsettled.
Measure the Entire Roof Edge, Not Only the Main Straight Run
It is easy to measure one long roof edge and overlook the rest of the perimeter. A useful project brief should identify all straight lengths, internal corners, external corners, returns, stop ends and changes in level. It should also show where the roof edge meets walls, parapets, flashings or other materials.
Photographs and simple marked-up drawings can make this far clearer. They show the roof in context and may reveal details that a single overall measurement would miss. A total length is useful, but it does not replace a full understanding of the roof geometry.
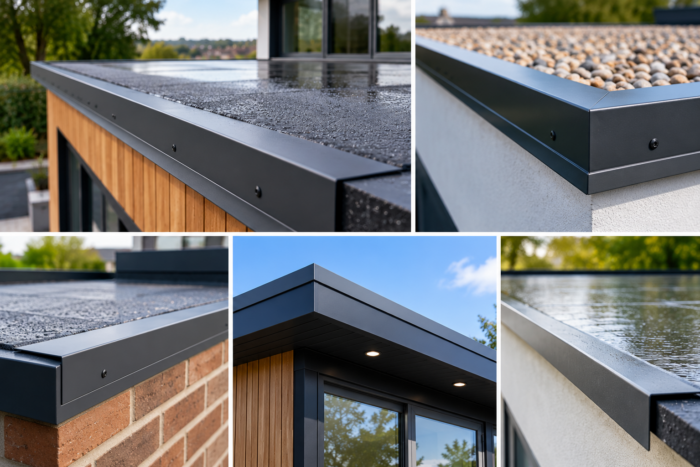
Straight Runs, Corners and Joiners: Planning a Continuous Trim Line
A flat roof drip edge normally follows the exposed perimeter of the roof. Straight lengths establish the main roofline, but corners and joiners determine whether that line remains consistent around the building. These are often the most visible points of the finished roof edge, particularly at the front corners of a garage or the outer edges of a rear extension.
The most effective approach is to view the trim as one connected system. Straight lengths, external corners, internal corners and joiners should all follow the actual form of the roof. A simple rectangular roof may have straightforward component requirements. A roof with several returns, projecting walls or adjoining elevations may need more careful planning.
Straight Drip Trim on Long Roof Edges
Straight drip trim forms the main line around a roof perimeter. It is particularly visible where a roof runs above a wide patio door, a long wall of brickwork or a garden-facing elevation. The trim should be selected with the roof build-up and intended face depth in mind, rather than simply by choosing a length that appears convenient.
On a longer roof run, consider how the trim will align with fascia, guttering and the wall finish below. A continuous edge can make the roofline look calmer and more deliberate. It can also reduce the visual disruption created by unrelated profiles or uneven roof-edge details.
Long runs should also be considered in relation to joints. Even where the roofline appears simple from a distance, the detail needs to account for how sections meet, how corners are resolved and how the full perimeter will look once complete.
External Corners at Outward Roof Turns
External corners are required where the roof perimeter turns outward around a visible corner. These are often prominent because they can be seen from driveways, patios, paths and approach routes. The corner should follow the actual shape of the building, whether that is a standard 90-degree turn or part of a more unusual architectural detail.
The 90-degree external corner for aluminium roof edge drip trim provides a useful reference for a standard external-corner component. It should still be checked against the actual roof geometry and wall layout. A standard corner product should not lead to an assumption that every external turn will suit the same detail.
Corners often become the point where a roofline either looks continuous or visibly interrupted. It is worth identifying them early in the project, especially where the roof edge changes direction around a new extension or joins an existing structure.
Internal Corners and Recessed Roof Returns
Internal corners are relevant where the roof perimeter turns inward, such as around a recessed wall section, side return or architectural notch. These details can be easier to miss on an elevation drawing because they may sit behind another part of the building or be hidden by the roof shape.
An internal corner needs to work with the roof covering, the wall interface and any nearby flashing or drainage detail. It should also maintain the same overall visual direction as the straight roof-edge sections.
Planning internal corners early helps prevent a situation where a roof edge is treated as a single line until the final stage, only for a recessed junction to require a different approach. A roof perimeter should be viewed from above as well as from the ground, because the plan shape often reveals the true complexity of the trim line.
Joiners and Alignment Across Longer Runs
Long roof-edge runs usually require sections to meet. These connections should be planned as part of the whole perimeter rather than considered only after straight lengths have been selected. Alignment, spacing and continuity across the visible roof edge all contribute to the final appearance.
Joiner components can help maintain a consistent line between trim sections. The important point is to treat each connection as part of the wider roof detail, not as an improvised gap-filling exercise. The roof covering, trim profile and visual edge should all remain coherent through the full run.
This is particularly important where the roofline is visible from inside the building through large glazed doors. A clean, continuous exterior edge can make the whole extension feel more finished when viewed from the garden and from within the property.
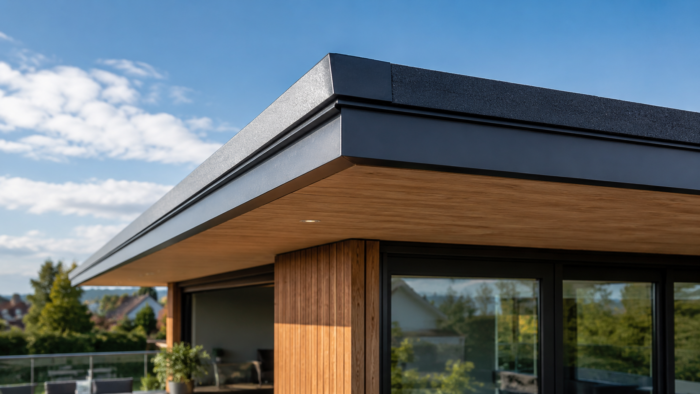
Drip Trim, Flashing and Termination Bars Have Different Jobs
Flat roofs can include several aluminium accessories, but these products should not be used interchangeably. Drip trim is primarily used at the outer roof perimeter where water leaves the roof edge. Roof flashing is generally used at junctions, such as wall abutments, changes in level, parapets or roof penetrations. Termination bars can be relevant where a roofing membrane requires a mechanical fixing at an upstand or edge.
The most useful way to select a roof accessory is to begin with the question: what does this junction need to do? Is it the outer perimeter where rainwater should leave the roof? Is it a wall connection? Is it an upstand? Is it a change in level? Is it a penetration through the roof surface?
Once the role of the detail is clear, the correct product type can be considered more confidently. This avoids trying to use a visually similar profile for a position it was not intended to address.
Roof Flashing at Wall Junctions and Changes in Level
Roof flashing is usually used where the roof meets another surface or changes direction. This may include wall abutments, parapets, changes in roof level, rooflight upstands and other areas where water needs to be managed carefully.
The aluminium roof flashing in a 3m length provides a useful reference for roof junction details. It should not be viewed as a replacement for drip edge trim at the outer roof perimeter because the two products are intended for different positions within the roof arrangement.
A well-planned roof can include both drip trim and flashing, but each should be used where its function is relevant. The roof edge needs a clear route into the gutter, while wall and level-change junctions need their own suitable weathering details.
Termination Bars and Membrane-Related Edges
Termination bars can be relevant where a roofing membrane needs mechanical fixing at an upstand or edge. Their selection should follow the membrane manufacturer’s requirements and the project-specific roof detail, because membrane systems differ in their fixing and edge requirements.
A termination bar should not be treated as a general decorative trim. It performs a specific role within a membrane-related junction. The roof covering, upstand, wall finish and adjacent flashing arrangement all need to be considered together.
Where several roof accessories appear close together, a clear roof section drawing can be particularly useful. It helps roofing contractors, builders, fabricators and project managers understand which component belongs where and how the visible roof edge is intended to look.
Moisture Resistance and the Wider Roof Detail
Flat roof drip edge trim should be considered within the wider context of how roofs, walls and adjoining surfaces manage rain and moisture. For broader England-specific context, the Approved Document C guidance on resistance to moisture explains wider requirements relating to moisture resistance in roofs and walls. It is not a direct installation guide for a particular drip trim product.
The final roof edge should therefore be reviewed as a complete arrangement. Roof falls, outlets, membranes, flashings, fascia, guttering and wall finishes all have connected but different functions. A carefully chosen trim can support the intended roof perimeter detail, but it does not make the rest of the roof design unnecessary.
Keep the Roof Edge and Rainwater Route Connected
Rainwater movement should be considered from the upper roof surface through to the gutter and downpipe route. A roof may look tidy at the perimeter yet still need careful thought about where water is collected and how it leaves the building at lower level.
The aluminium rainwater goods range provides useful context for gutters, outlets and downpipe components that may form part of the broader roofline arrangement. The final choice should still reflect roof area, falls, outlet positions, discharge requirements and the specific building detail.
This broader approach is especially important on larger flat roofs, where several roof edges may meet different gutter runs or drainage locations. Treating the rainwater route as part of the roof-edge design can make later decisions clearer and help avoid visual compromises around the fascia and gutter line.
Aluminium Finish and Colour Coordination
The visible trim line can make a noticeable difference to the appearance of a flat roof extension, garage or commercial elevation. Mill finish may suit some requirements, while powder-coated aluminium can provide a more coordinated direction where the drip trim needs to sit alongside windows, doors, fascias, gutters, soffits, cladding trims or other exterior metalwork.
Colour should not be a last-minute decision. A dark trim can create a sharp horizontal line above pale render or brickwork. A softer grey or closely matched finish may make the roof edge feel quieter and allow the wall surface to take visual priority.
The product page for Metal Profiles Ltd’s drip trim identifies mill finish and a wide range of colour choices. A wide range of RAL or BS colour options may be available, subject to the selected finish and project requirement. The final colour should be checked against the actual exterior materials rather than judged only from a screen image or isolated colour chart.
Long Rooflines Need Consistent Visual Decisions
A short garage roof edge may only be visible from one main viewpoint. A long rear extension can be seen from the patio, garden, kitchen, living area and neighbouring properties. The longer the roofline, the more important it becomes to coordinate trim, fascia, gutter and downpipe decisions.
This does not mean every component has to match exactly. It means the relationship should be deliberate. A trim may align with a black fascia and gutter to create a stronger modern outline. It may also use a softer colour that works with aluminium doors and light render. The wider exterior palette should guide that choice.

Flat Roof Drip Edge Trim for Domestic and Commercial Projects
On domestic projects, flat roof drip edge trim may be considered for rear extensions, garages, garden rooms, porches and other low-slope roof additions. The roof edge is often close to patios, doors and garden spaces, which means the finish is highly visible.
Even a simple domestic roof can need careful planning if it includes corners, rooflight positions, side returns or a junction with an existing building. The trim should be selected with these conditions in mind rather than added only when the roof surface is complete.
On commercial projects, roof perimeters may be longer, more exposed or connected to more complex wall and drainage details. Offices, apartment buildings, retail units and public-facing entrances can all need coordination between roofing, wall finishes, rainwater goods and exterior metalwork.
When Project-Specific Fabrication May Be Relevant
Standard straight trim, corners and joiners may suit many typical roof layouts. Some projects include unusual angles, non-standard roof-edge widths, complex parapet forms or extensive runs that require a more specific fabrication approach.
In these situations, drawings, elevations, roof sections and accurate site measurements become especially important. They help define whether the standard accessory range suits the roof or whether a bespoke detail needs to be discussed.
The key is not to assume that every flat roof is standard simply because it looks rectangular from ground level. Roof geometry, wall connections and visible finish expectations can create different requirements from one project to another.
What to Confirm Before Ordering Flat Roof Drip Edge Trim
A useful ordering brief should describe the complete roof edge, not only one straight length. Begin with the full perimeter and identify what happens at every change of direction. Add notes about roof build-up, fascia position, gutter arrangement, roof covering and nearby flashing or membrane details.
Useful information includes:
- Total straight run lengths around the roof perimeter
- Number of internal and external corners
- Joiner requirements and visible roof-edge continuity
- Proposed trim face depth
- Fascia, gutter and downpipe arrangement
- Roof type, roof falls and outlet locations
- Nearby wall abutments, rooflights, parapets or changes in level
- Preferred finish or colour direction
- Photographs, plan drawings and roof-edge sections
- Site access and delivery considerations where the roof is difficult to reach
The more complete the project information, the easier it is to discuss a suitable roof-edge arrangement. Clear photographs and drawings can be especially useful where the roof meets existing walls, changes level or includes several components along the perimeter.
FAQ
-
What is flat roof drip edge trim?
Flat roof drip edge trim is an edge profile used around the perimeter of a flat roof. It helps create a finished roof line and is intended to direct rainwater from the roof edge towards the gutter as part of the wider roof and drainage arrangement.
-
Is drip edge trim the same as roof flashing?
No. Drip edge trim is mainly used at the outer roof perimeter where water leaves the roof. Roof flashing is generally used at junctions such as wall abutments, parapets, rooflight edges, changes in level or other areas where the roof meets another surface.
-
Do I need corners and joiners with drip trim?
Corners and joiners may be needed where the roof edge changes direction or where straight trim sections meet. The exact requirements depend on the roof perimeter, returns, wall geometry, selected trim system and the wider roofing detail.
-
Can flat roof drip edge trim be colour coordinated?
Powder-coated aluminium trim may be available in a range of colour directions, subject to the selected finish and project requirement. This can help coordinate the roof edge with fascia, gutters, doors, windows and other visible exterior components.
-
What should I provide for a drip trim enquiry?
Provide total run lengths, internal and external corner quantities, photographs, drawings, roof build-up information, face-depth preference, finish direction, gutter arrangement and details of any related flashing, parapet, rooflight or wall junctions.
Metal Profiles Ltd supplies aluminium roof accessories, roofline products and architectural metalwork for UK projects. Flat roof drip edge trim may be considered for extensions, garages, garden rooms, low-slope roof edges and project-specific roofline requirements. Share roof-edge lengths, roof build-up information, corner details, fascia and gutter context, photographs, drawings and preferred finish when discussing a trim requirement. A wide range of RAL or BS colour options may be available, subject to the selected finish and project requirement. For product or project support, Contact Metal Profiles Ltd today.
Discover more from Metal Profiles Ltd
Subscribe to get the latest posts sent to your email.